
Transforming a blank wall into a productive herb garden is less about gardening and more about smart spatial engineering.
- Building a vertical “living system” uses up to 90% less water and can be done for under $50.
- Success depends on choosing the right materials to prevent wall damage and a strategic planting order for continuous harvests.
Recommendation: Start by viewing your wall not as a barrier, but as a high-performance platform for fresh, on-demand food and daily well-being.
For apartment dwellers, the dream of a lush, productive garden often clashes with the reality of a concrete balcony and zero soil. The conventional wisdom suggests a few pots on a windowsill, a compromise that rarely satisfies the desire for a real harvest. We’re told to think small, to limit our ambitions to what fits on a shelf. This approach, however, overlooks the most abundant and underutilized resource in any urban home: vertical space.
But what if the solution wasn’t just about saving space? What if a vertical wall could become more than just a place for plants? The real innovation lies in reframing the concept entirely. Instead of a collection of pots, we can build a high-performance living system—an integrated micro-ecosystem that is hyper-efficient with water, structurally sound, and designed for continuous production. This isn’t just gardening; it’s a form of spatial engineering that turns a decorative element into a productive powerhouse.
This guide moves beyond the basics of “add sun and water.” We will deconstruct the engineering of a successful vertical herb wall, from its hydroponic efficiency and budget-friendly construction to the critical details of mold prevention and structural stability. We’ll explore how to operate this system for a year-round harvest and discover how this single project can redefine your relationship with your living space, functioning as both an art piece and a source of daily wellness.
To help you navigate this transformation, this article breaks down the essential components of creating and maintaining a productive vertical herb garden. Explore the sections below to master each stage of the process, from initial design to long-term enjoyment.
Summary: Your Guide to a High-Performance Vertical Herb Wall
- Why Vertical Hydroponics Uses 90% Less Water Than Soil?
- How to Build a Vertical Strawberry Tower for Under $50?
- Felt Pockets or Rigid Planters: Which Prevents Mold on Walls?
- The Anchoring Error That Causes Vertical Gardens to Fall in Wind
- In What Order Should You Plant Greens for Continuous Harvest?
- Why You Should Build Up, Not Out, in Small Rooms?
- Why Art Galleries Are Often the Precursors to Gentrification?
- Vegetables or Flowers: Which Gardening Approach Reduces Stress More Effectively?
Why Vertical Hydroponics Uses 90% Less Water Than Soil?
The core innovation behind a high-performance vertical garden is its incredible water efficiency, a feature primarily achieved through hydroponic or semi-hydroponic principles. Unlike traditional soil gardening where a significant amount of water is lost to evaporation and deep soil runoff, a vertical system treats water as a precious, recirculating resource. This efficiency isn’t magic; it’s the result of targeted spatial engineering designed for a closed-loop environment.
The primary mechanism is a recirculating nutrient solution. In a typical setup, water enriched with nutrients is pumped to the top tier of the vertical structure. From there, gravity takes over. The water trickles down, bathing the roots of each plant in the system before being collected in a reservoir at the base. This collected water is then pumped back to the top, starting the cycle anew. This process eliminates waste almost entirely; the only water that leaves the system is through plant uptake and minor evaporation.
Furthermore, because the roots are directly exposed to this nutrient-rich water, they don’t need to expend energy growing extensive root systems to search for sustenance as they would in soil. All the plant’s energy is directed towards producing lush foliage—the very herbs you want to harvest. This direct delivery method ensures that every drop of water serves a purpose, making it a profoundly sustainable solution for urban environments where resources are at a premium. It’s a perfect example of a self-contained micro-ecosystem thriving on a wall.
How to Build a Vertical Strawberry Tower for Under $50?
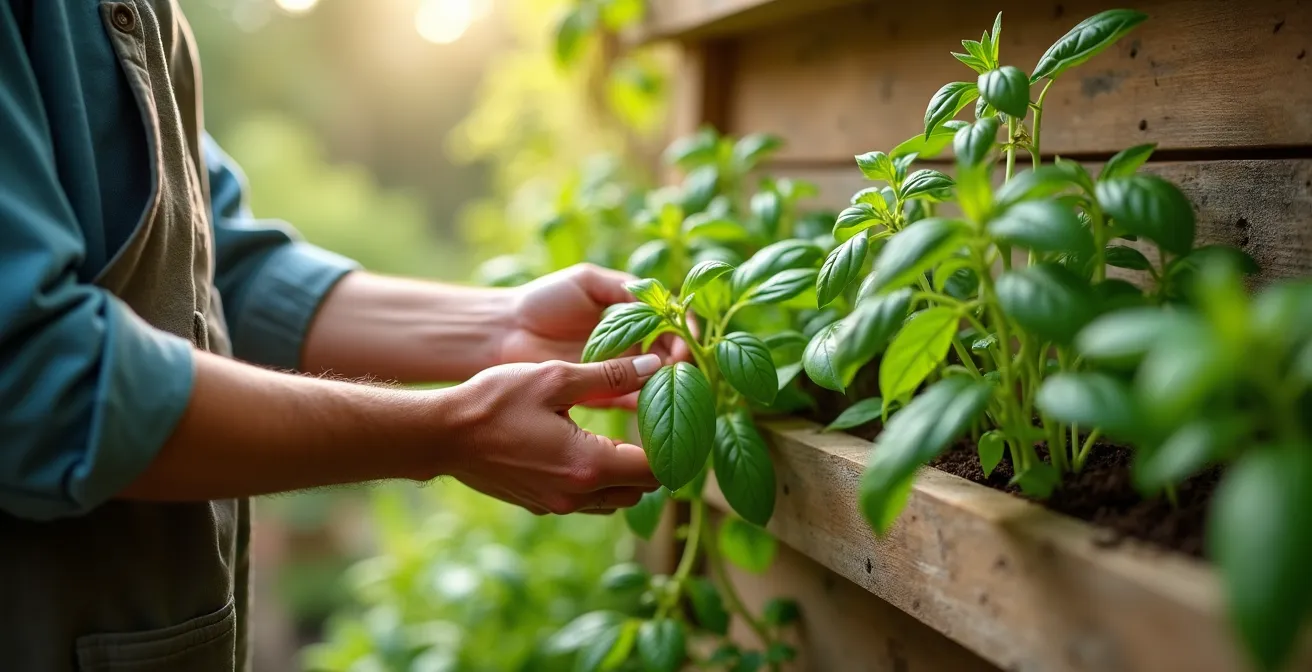
While the title suggests strawberries, the principle of a low-cost, DIY vertical tower is perfectly suited for a diverse herb garden, transforming your balcony into a productive oasis without breaking the bank. The idea that a robust living system requires a hefty investment is a common misconception. With some ingenuity and repurposed materials, a highly functional and beautiful herb wall is well within a $50 budget.
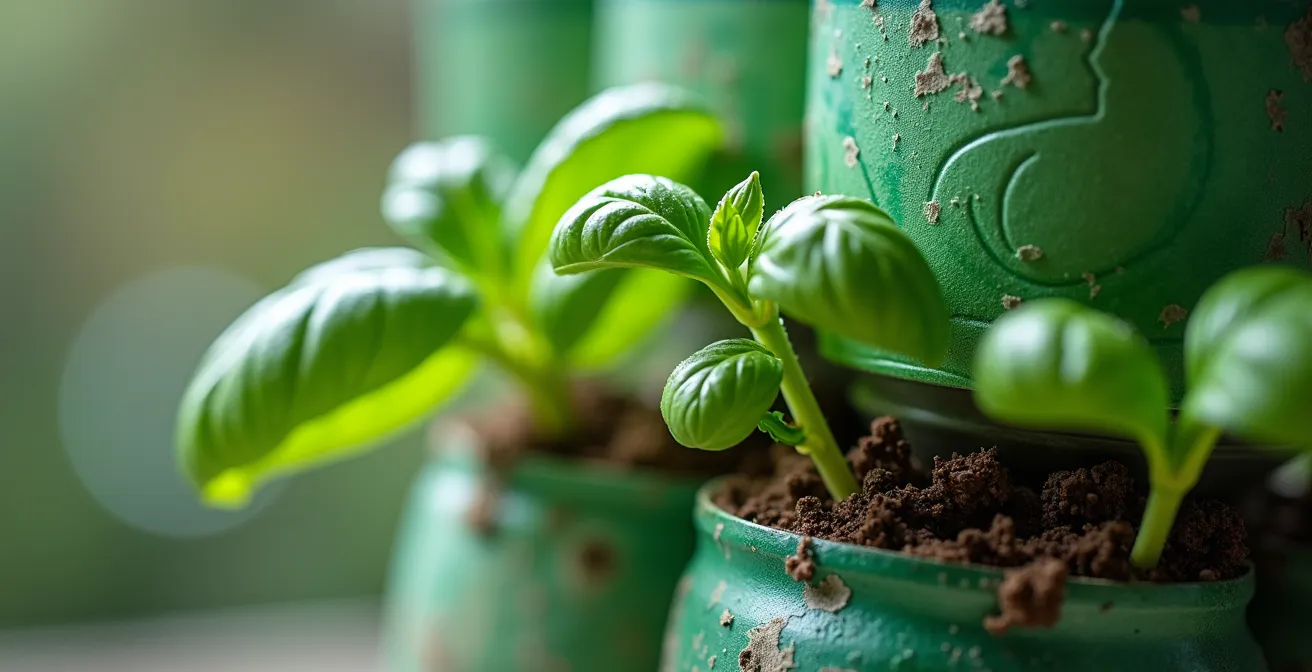
One proven approach involves using recycled materials. A DIY enthusiast, for instance, successfully built a complete vertical herb garden for approximately $50 using recycled pallets. This budget covered everything from the wood sealer to the hardware and, of course, the herbs themselves. The project involved constructing simple planter boxes with drainage holes from scrap wood, which were then mounted onto the pallet frame. This method proves that you don’t need expensive pre-made kits to achieve a stunning result.
To plan your budget, it’s helpful to compare different material options. Recycled materials are almost always the most cost-effective, though they may require more upfront labor and have a shorter lifespan. New materials offer greater durability and often a quicker setup time but come at a higher price point.
The table below, based on an analysis of different DIY herb walls, breaks down the trade-offs, helping you engineer a solution that fits your budget and skill level.
| Material Option | Cost | Durability | Setup Time |
|---|---|---|---|
| Recycled Tin Cans + Barn Wood | $5-10 | 2-3 years | Under 1 hour |
| Recycled Pallets + Paint | $20-30 | 3-5 years | 2-3 hours |
| Plastic Bottles + Wire | $0-5 | 1-2 years | 30 minutes |
| New PVC Tower Kit | $45-50 | 5+ years | 1 hour |
Felt Pockets or Rigid Planters: Which Prevents Mold on Walls?
When engineering a vertical garden against an apartment wall, protecting that wall from moisture is non-negotiable. The wrong choice of material can lead to trapped humidity, paint damage, and dreaded mold growth. The two most common DIY options are soft felt pockets and rigid plastic planters, each with distinct implications for wall health. Understanding their properties is crucial for the long-term integrity of your home.
Felt pockets are popular for their flexibility and organic look, but they are inherently porous. They absorb and hold water, creating a constantly damp surface that rests directly against your wall. Without a proper waterproof barrier, this is a recipe for disaster. Rigid plastic or modular planters, on the other hand, often create a natural air gap between the container and the wall. This small space allows for airflow, which is critical for drying out any incidental moisture and preventing mold from taking hold.
Ultimately, while felt can work, it requires a more robust and correctly installed backing system to be safe. As a comparison of outdoor plant wall materials shows, systems that provide inherent separation from the wall surface generally pose a lower risk. For apartment dwellers, especially renters, choosing a system with built-in drainage and airflow is the smarter, safer path to a healthy living wall.
Your Action Plan: Creating a Failsafe Moisture Barrier
- Points of contact: Install a waterproof backing board (like Coroplast) with 1-inch spacers to create an air gap between it and the building wall.
- Collecte: Seal all mounting points and screws with a waterproof, mold-resistant silicone sealant.
- Cohérence: Ensure each planter row has built-in drainage channels or drill small holes to guide excess water downwards.
- Mémorabilité/émotion: Install a drip tray or gutter system at the very bottom of the installation to catch all runoff and protect your floor.
- Plan d’intégration: Leave small ventilation gaps between planter rows to encourage horizontal airflow across the entire system.
The Anchoring Error That Causes Vertical Gardens to Fall in Wind
The most catastrophic failure for a vertical garden is a structural one. A fully watered wall of soil, plants, and planters is surprisingly heavy, and underestimating its weight is a critical error. Add the force of a strong gust of wind on a balcony, and an improperly anchored system can quickly become a dangerous projectile. Proper anchoring isn’t just about hanging a picture; it’s a fundamental aspect of your project’s spatial engineering and safety.
The primary mistake is choosing an anchoring method based on the planter’s empty weight. Soil and water can increase the total weight by a factor of two or three. You must anchor for the maximum potential load, not the day-one load. This means using hardware rated for significantly more weight than you think you need, such as heavy-duty toggle bolts for drywall or concrete sleeve anchors for brick. Always anchor into a structural element like a stud, not just the drywall or plaster.
For renters who can’t drill into walls, the challenge is greater but not insurmountable. The key is to shift from hanging solutions to freestanding or tension-based systems. These methods transfer the load to the floor and ceiling or use the structure of a balcony railing, avoiding permanent damage to the walls. These renter-friendly solutions require the same careful consideration of weight and stability but offer a non-destructive path to a secure and thriving vertical garden.
Checklist: Renter-Friendly Anchoring Solutions
- Points of contact: Use heavy-duty, removable adhesive strips or hooks rated for outdoor use and heavy frames, always testing with 20% more weight than the garden’s full, watered weight.
- Collecte: For lightweight systems, install high-tension rods between two solid walls or in an alcove to create a hanging point without drilling.
- Cohérence: Build a freestanding A-frame or ladder-style structure that leans securely against the wall, transferring all weight to the floor.
- Mémorabilité/émotion: For balconies, use adjustable over-the-rail planter brackets that clamp securely onto the railing without screws.
- Plan d’intégration: Deploy freestanding systems with heavily weighted bases (using sandbags or pavers) that support vertical poles for hanging planters.
In What Order Should You Plant Greens for Continuous Harvest?
A vertical herb wall is more than just a decoration; it’s a dynamic production line. The ultimate goal is a harvest-on-demand system that provides fresh herbs year-round. Achieving this requires a strategic approach to planting known as “succession planting,” adapted for a vertical environment. This means moving beyond random placement and thinking like a farm manager, orchestrating a continuous cycle of growth, harvest, and renewal.
The key is to group herbs by their needs and growth cycles. One successful gardener achieved a continuous harvest by organizing their wall vertically: drought-tolerant perennials like rosemary and thyme, which need less water, were placed at the top. Thirstier, fast-growing herbs like basil, dill, and cilantro were grouped in the middle sections where they could be watered more frequently without over-saturating the plants below. This zoning creates a more efficient and healthy micro-ecosystem.
The second part of the strategy is staggering your planting times. Fast-growing herbs like basil and cilantro can often be harvested within 25-40 days. Instead of planting them all at once, you can sow new seeds every few weeks in designated empty pockets. As you harvest a mature plant, a younger one is already on its way up, ensuring you never have a “bare” wall. The slower-growing perennials like rosemary and sage act as the permanent, structural backbone of the garden, providing a consistent green look and a steady, if less frequent, harvest while the faster crops rotate around them.
Why You Should Build Up, Not Out, in Small Rooms?
The philosophy of “building up, not out” is the cornerstone of modern small-space living, and a vertical herb garden is its most vibrant expression. In an apartment, every square foot of floor space is precious real estate. Placing bulky pots on the floor or on a wide shelf consumes this valuable territory for what is often a minimal return. By shifting our perspective 90 degrees, we unlock a vast, untapped resource: our walls. This isn’t just a clever trick; it’s a fundamental re-evaluation of spatial efficiency.
This principle is most dramatically demonstrated in commercial vertical farming. By stacking layers of crops, these operations can achieve incredible yields in a tiny footprint. Data shows that hydroponic vertical farms can produce up to 10 times more crops per square meter than traditional field agriculture. While a home garden operates on a smaller scale, the principle holds true. You can cultivate an entire collection of herbs—providing culinary, aromatic, and aesthetic benefits—in just one or two square feet of floor space that a single large pot might have occupied.
This approach transforms a wall from a static boundary into a dynamic, productive surface. As shown in numerous DIY projects, floating shelves, metal mesh panels, and vertical planters allow home gardeners to create a complete herb collection without sacrificing a single inch of living area. Building up frees your floor for furniture, movement, and life, while your walls get to work, growing food and purifying the air. It’s the ultimate expression of maximizing utility in a minimal urban footprint.
Why Art Galleries Are Often the Precursors to Gentrification?
At first glance, this question seems worlds away from gardening. Yet, it holds the key to understanding the ultimate evolution of a vertical herb wall: its transformation into a piece of living art. Art galleries move into transitional neighborhoods because they signal cultural value, creativity, and an investment in aesthetics. A well-designed vertical garden does the same for a home. It elevates a space beyond mere function, turning it into a statement of productive aesthetics.
A lush, thriving wall of herbs is not just useful; it’s inherently beautiful. It introduces texture, color, and life to a flat, sterile surface. As the editorial team at Gardening Know How notes, a vertical garden is unique because it “functions as a piece of art as well.” This dual purpose is what makes it so powerful in a small space. It’s a decoration that you can also eat, an installation that changes with the seasons and with every harvest.
A vertical herb garden is not only useful, it functions as a piece of art as well.
– Gardening Know How Editorial Team, Information About DIY Herb Walls
Leaning into this concept allows you to be more intentional with your design. You can think like a curator, not just a gardener. Arrange your herbs by color gradients, from the deep green of basil to the silvery tones of sage. Frame the entire installation in a shadow box to give it the presence of a formal art piece. Use subtle grow lights not just for photosynthesis, but as “gallery lighting” to highlight the textures of the leaves at night. By treating your wall as an exhibition, you elevate the entire room, making it a space that is not only more productive but also more beautiful and valuable.
Key takeaways
- A vertical herb garden is an engineered living system, not just a set of pots.
- Success hinges on technical choices: water-efficient design, mold-proof materials, and secure anchoring.
- Strategic planting (by water needs and growth cycle) is essential for achieving a continuous, year-round harvest.
Vegetables or Flowers: Which Gardening Approach Reduces Stress More Effectively?
While flowers offer passive beauty, the daily, interactive nature of a productive herb garden provides a more profound and consistent form of stress relief. The true therapeutic benefit comes not just from seeing greenery, but from engaging with a living system that rewards your care with tangible, sensory feedback. It’s the difference between looking at a painting and being the artist.
The act of tending to herbs creates a gentle, mindful ritual. The simple tasks of watering, checking for new growth, and pruning leaves require a focused presence that pulls you away from digital distractions and daily anxieties. This is powerfully captured in a testimonial from one home gardener who found immense joy in the simple act of using their harvest: “The first night after it was finished, we made mint juleps using fresh mint snipped straight from the garden. It was hilariously thrilling for me…” This experience of going from plant to plate in seconds creates a powerful connection to your food and your home.

This daily interaction becomes a grounding ritual. As the gardener shared with the Making Lemonade blog, this small joy led her to actively “seek out recipes that use lots and lots of herbs so I have an excuse to go outside and utilize my garden.” This loop—care, harvest, enjoyment, and back to care—creates a continuous cycle of positive reinforcement. Unlike a vegetable garden with a single, distant harvest, an herb wall offers these small rewards almost daily. The aromatic release of snipping basil or mint provides instant aromatherapy, making the entire process a multi-sensory experience that actively reduces stress and enhances well-being.
Frequently Asked Questions on Vertical Herb Gardening
How long should I let herbs establish before hanging the wall vertically?
Leave the planted wall horizontal for about one month to allow roots to establish properly before hanging it vertically from wall hooks. This ensures the soil and plants are secure and won’t fall out.
Which herbs work best for continuous cut-and-come-again harvesting?
Basil, mint, cilantro, and parsley regenerate quickly after cutting. Harvest these every 25-40 days while maintaining perennials like rosemary and thyme as permanent anchors for your garden.
Can I mix sun-loving and shade-tolerant herbs on the same wall?
Yes, and you should use it to your advantage. Utilize the natural light gradient of a vertical surface—place sun-loving herbs like rosemary and thyme at the top where it’s typically brighter, and position more shade-tolerant herbs like parsley and mint lower on the wall.